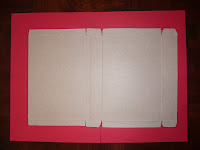
First of all, I cut cereal box at the side and lay it out on two pieces of red construction paper. Next, I stuck the printed side to the red construction paper with double-sided tape. Then the edges were folded down and secured with sticky tape. The size of the border did not matter because I would paste black construction paper over for the screen and keyboard.
While Sophie took her nap, I cut out a frame from a piece of orange corrugated paper and drew small squares on a beige/pale yellow construction paper. Then I gathered the rest of the materials I thought we would need and waited for the little one to wake up.
I let Sophie apply white paint on the "cover" of the laptop to give it an "artistic feel"... But she seemed to enjoy her free play with the leftover paint more.
End Product - Laptop "Cover"
Of course the laptop was not quite done yet. I pasted a sheet of transparency on the underside of the orange frame before securing it to the "laptop" (black side). The top side of the "screen" has been left open so that I can insert pictures or flash cards etc. Finally, I wrote the Alphabet and on the small squares and numbers 1-10 on circle sticker labels (to differentiate them from letters), cut them out and pasted them on the "keyboard" painstakingly.
End Product - Sophie's Laptop
Now Sophie would not have to compete with us for the laptop...


Wow! Nice laptop...too bad only 1 in the world, bought by you already ....heee....
ReplyDeleteso now u got a super computer for ur gal.
ReplyDeleteHaha... My hubby said my laptop is super slim n will call it I-Paper.
ReplyDelete